|

|
This screen was installed in the
raw water input line to the engine to keep out leaves, seaweed and any
other debris picked up from the surrounding water. The clear housing
allows inspection without taking it apart. |
I removed the original hand pump which was intended to be used to empty
the holding tank
while offshore and relocated it farther forward and re plumbed it as a
bilge pump in the center of the boat. I also added a thru-hull above the waterline on
the starboard side for the bilge water being pumped out.
|
|
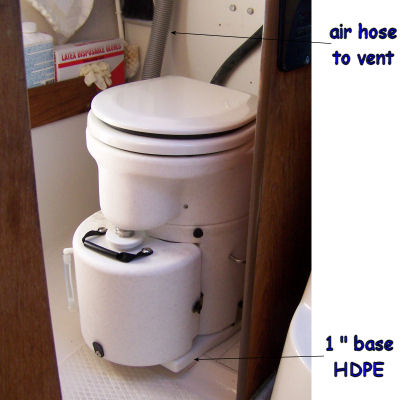
The airhead toilet was added in
October. The holding tank was removed back in July '07.
A 1" thick base was fabricated from a sheet of HDPE( high density
polyethelene). This was done becasue of the odd shape of the
floor which was designed for the original Jabsco head which was part of
the original installation.
The
hardest part was installing the vent. I didn't want to cut a hole
in the deck or cabin so I opted to go out the side of the hull as high as
possible. A cover is installed on the hull as high as it could
possibly go. The fan has to run all the time but it is very small
and draws a very small amount of current.
This worked great the four weeks on the water in March of '08. No
more looking for pumpouts. As a matter of fact it went the whole
season before I emptied the contents into a hole dug in the
backyard. No more odors either, this is the cleanest the boat has
smelled since it was new. Emptying the liquid from the Airhead toilet was a hassle so I plumbed it into a 9 gallon holding tank. It can be emptied at a dockside pump out or pumped overboard if offshore.
|
|
|
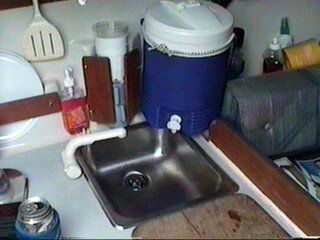
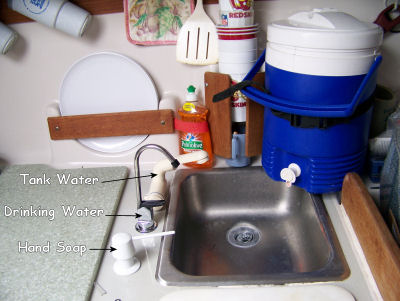
As seen in the picture the
hand pump has been removed and replaced with a white plastic faucet
with a switch that operates an electric pump mounted under the "V"
berth. A pump is mounted to a block of wood that is epoxied to the floor. Water is
pumped from the fresh water tank up front to the sink.
|
|
A hand soap bottle is installed
below the countertop.
Drinking water is provided from a 5 gallon carboy that is located
behind the refridgerator. This water is pumped though a filter
and then a UV sterilizer. When cruising up to three jugs may be
filled with drinking water. In order to keep from constantly
cycling the motor and running the UV sterilizer, drinking water can be
stored in the blue igloo cooler.
Tank water is kept clean with a small amount of bleach, therefore is
used for cleaning dishes and washing hands only.
|
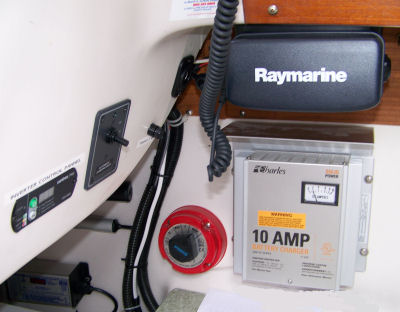
Battery charger was mounted
with two aluminum backing plates by sliding them up from the bottom
behind the liner. They were tapped for the mounting screws.
Tygon type tubing was used to protect the wires fed through the holes
in fiberglass below the charger. On the far left is a USB
socket to plug the cell phone in to recharge its battery.
|
|
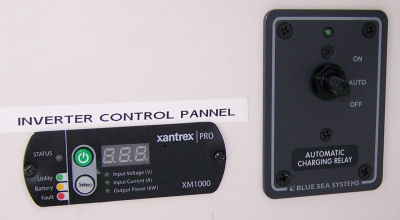
The Raymarine DSC radio is mounted just aft of the sink. The microphone can just reach the helm. There is a speaker for the radio mounted port side of the helm. A more robust
charger has been added to accomodate the AGM batteries. The Xantrex 1000 watt
inverter is mounted below the countertop along with the starting
battery and the Automatic Chargine Relay. The control panels are
mounted to the left of the radio.
|
|
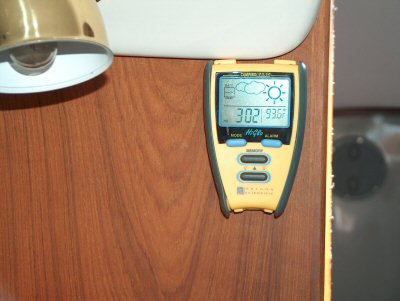
This camping barometer from
Oregon Scientific helps keep track of changing weather and gives the
cabin temperature. I still listen to NOAA weather
regularly, but this thing does help with local conditions.
|
|
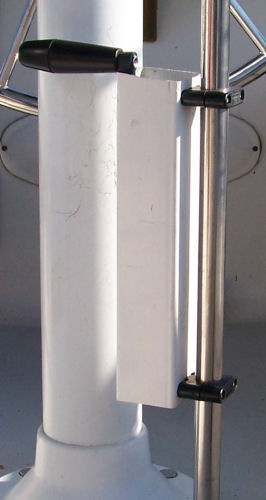
This winch handle holder was
constructed of some left over downspout material and a couple of
universal rail clamps. This beats fishing around in the storage
locker for a winch handle. I always know where it is.
|
|
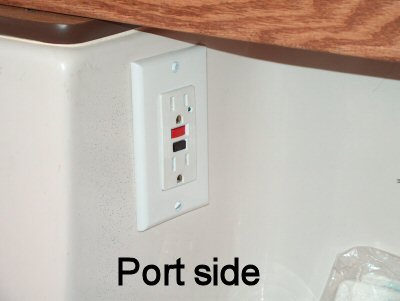
This outlet is just behind
the port seat and another outlet on the starboard side is also
protected by this GFI.
|
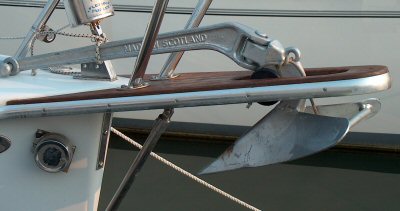
The roller under the anchor was replaced after the original one wore
out.
|
The CQR anchor works best in most conditions. I carry a Fortress anchor in the Starboard locker as a second anchor.
|
Not shown is the Borel Mfg. high temperature alarm. A sensor is mounted to the exhaust
just below the mixing elbow. The alarm is mounted just below the
engine control panel in the cockpit.
|
|
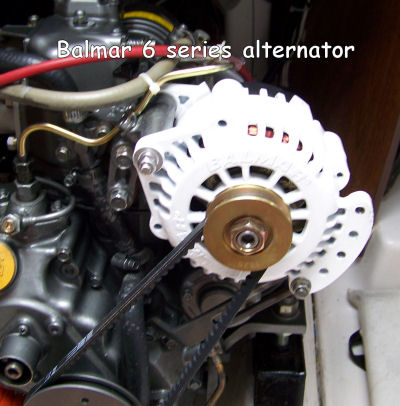
Retrofitting this Balmar
alternator was a challenge. Two drill bushings of different sizes
were used to fit the 1/2" threadstock used on the upper left
mount. Two washers were added to shim the alternator forward to
better keep the two pulleys aligned. The real benefits of the
higher output alternator will only be realized when cruising. The
3 AGM batteries will quickly charge with this addition. Sometimes
when motoring for extended periods there is a possibility of
overcharging the AGM batteries with the original alternator. The
ARS-5 three stage regulator
should prevent any damage to the batteries.
|
|
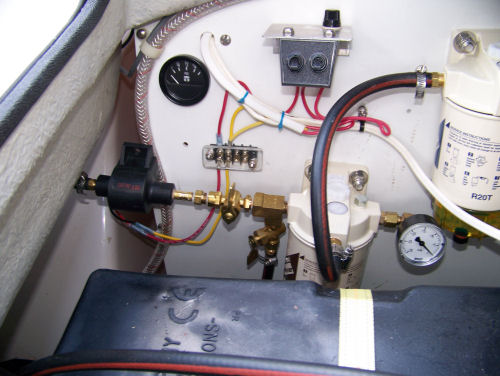
An 18 gallon diesel fuel tank
was added this past summer to replace the portable one in the
cockpit. A fuel gauge operates when the toggle switch is
on. The other toggle switch turns a fuel pump on which circulates
fuel through the filters and back to the tank. During periods of
infrequent use the fuel can be cleaned by circulating through the
filters. The first filter is 10 micron and the second is 2
micron. Fuel to the engine does not go through this pump.
The valve to the pump has to be turned off when not in use or air will
be pulled into the line when the engine is running. The tank is
located under the starboard seat. The addition of the two vacuum
gauges(only one is visible in the picture) allow for early detection of
a clogged filter. I carry spare filters and I should be able to
identify a filter that is getting dirty and change it before it becomes
an issue.
|
|
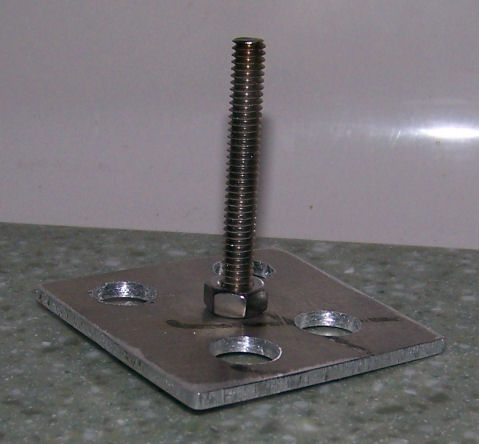
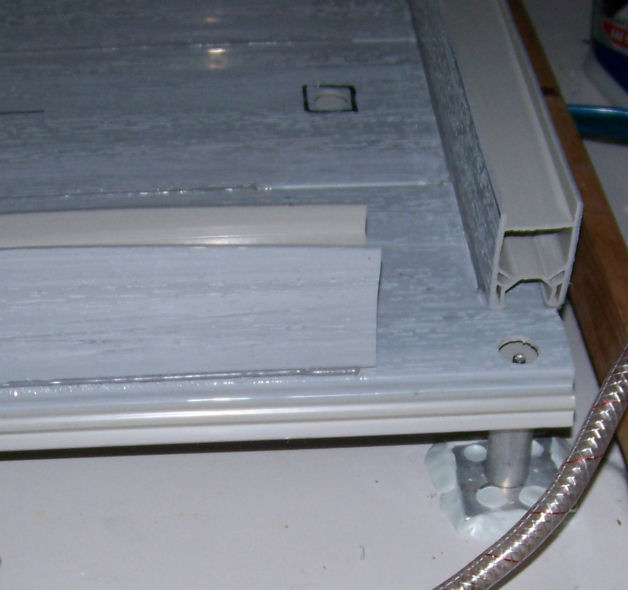
I fabricated 6 of these stud
mounts of various lengths to mount the fuel tank. Three of them
have tubing inserted around the stud to hold the platform up off the
floor. The plate is 1/8" thick aluminum and the stud is 1/4-20
stainless thread stock. One of the six can be seen below epoxied
to the floor. A clearance hole from the top allowed access for a
deep 7/16" socket to tighten the 1/4" nuts which support the
deck. The decking material was left over from a porch redecking
project around the house. The pieces were welded together with a
plastic welder and PVC welding rod.
|
|
I tried two types of
epoxy. I started out with Marine-tex. Some were done with
Loctite marine grade putty type that you cut to length and knead, then
just push it around and through the mounting plate. Both seemed
to work ok, although I suspect the Marine-tex may be stronger because
it flows easier around the mounting plate. This tank will give us
better range and it moves a lot of weight down and forward which is
good for sailing as well as trailering. I used to remove the
portable tank while trailering. This is no longer necessary or an
option.
|